
FashionDoll Scene, Weekly Feature
----------------------------------------------------------------------------
Weekly Feature by Sonia Rivera
Geta
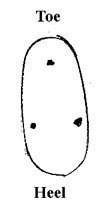
View from the top of the shoe, with thread placement indicate by dots.
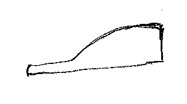
After tracing the bottom of the doll's foot, draw a line across the bottom. The finished drawing should look similar to this.
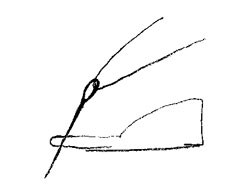
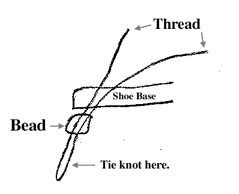
After threading the needle to the half-way point of the thread, run it through the base.
After the thread has been run through the sole, thread on a bead, cut the needle off and tie a knot in the end.
Japanese shoes or "geta", which are traditionally worn with the Kimono, are really quite easy to make. The shoes have a simple paddle-like design with only a V-strap holding them on. Most of the items needed to make the shoes are things you probably already have on hand.
Materials:
Molding clay such as Fimo or Sculpey Matching embroidery floss (approx. 8" long) Beads Large sewing needle
Begin by choosing the doll for which you will be making the shoes. Lay the doll on its side and trace the bottom curve of the foot onto a piece of paper. Now lay a ruler even with the flat (toe) part of the foot and draw a line all the way back to the heel. This will give you the curve you need to support the doll.
Once your tracing is done, begin with an amount of the sculpting clay. Shape it first into the paddle-shape you want the shoe to have, the build up the bottom until it matches your drawing.
With the large sewing needle threaded to the center of the embroidery floss, run the needle through the shoe base, approximately where the middle toe will sit. Do not pull the floss all the way through. Instead thread on a bead, cut off the needle and tie a knot large enough to keep the thread from falling back through the bead. Now take the ends of the floss, which should still be on the top of the shoe, and thread one of them onto the needle. Run the needle down the side of the shoe, approximately to the back part of the instep. Thread on a bead and tie off, just as before. Repeat for outside thread.
Once the beads are in place, press them into the bottom of the shoe. Cover with a small amount of the clay, so that the beads are not visible.
Wet the embroidery floss and then place in oven at temperature and times recommended on sculpting clay package. Let cool and then they can be used on your doll!
by Sonia Rivera
--------------------------------------------------------------------------
backissues | write us | home | contributors | FDS shop
-
 Carmen Tonne